
Safe lock help · Burg-Wächter
Safe lock troubleshooting › Burg-Wächter › Combi-Line (SecuTronic and Fingerscan keypads)
The Burg-Wächter Combi-Line safes come with three different electronic keypads: the Fingerscan (code or fingerprint), the SecuTronic with little icon lights, and the newer SecuTronic with a display. This guide shows how to open each one, change the code, replace the batteries, and what the lights and messages mean.
Want the whole manual? Jump to the manufacturer download links.
Is this your lock?
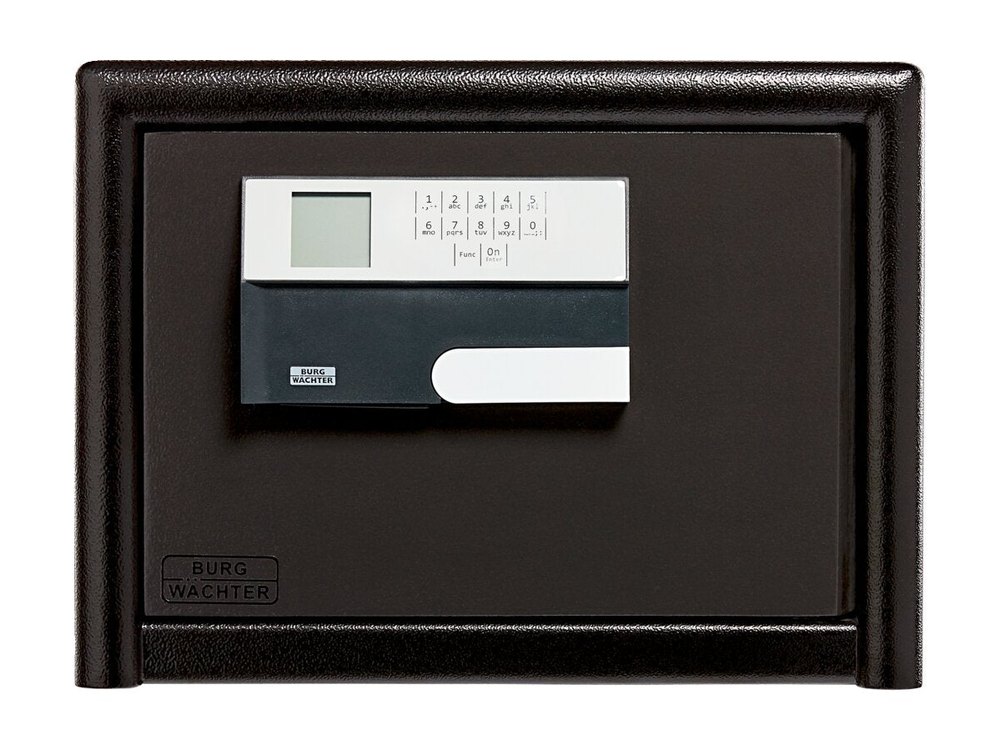
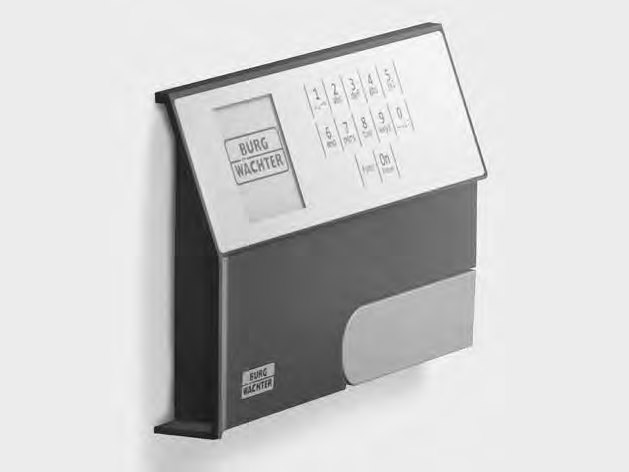
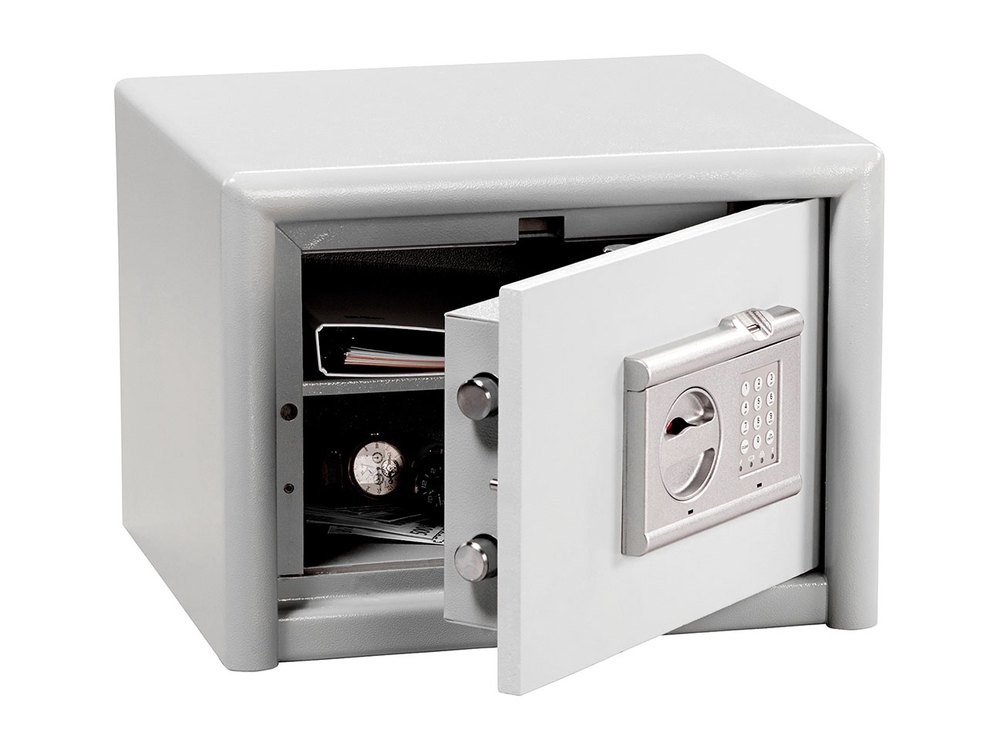
- Fingerscan (TRSE10): a keypad with number keys, Clear and On/Enter keys, four small LED icons under the keys, a rotary handle beside it, and a finger sensor strip along the top. It opens with a 6-digit code or with two different fingers, and keeps up to 10 fingerprints. It runs on 3 AA batteries.
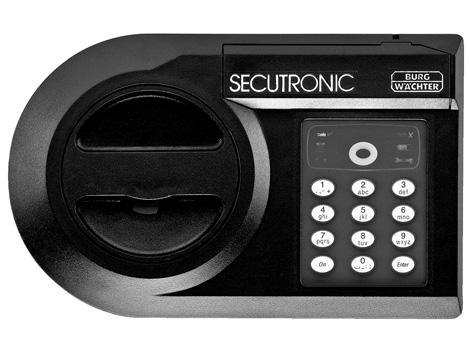
- SecuTronic (lights): a keypad with the word SECUTRONIC and the Burg-Wächter logo, a knob beside it, number keys with On and Enter, and a small panel of icons (Code ✓, Code ✗, an hourglass, Prog, a battery and a wrench). It uses one 6-digit code. Lock body A runs on 3 AAA batteries, lock body B on 3 AA.
- SecuTronic with display (TRSE 12 H): a small screen, number keys, a Func key and an On/Enter key. The menus are in several languages. It runs on 4 AA batteries and has an administrator code and a user code. This is the keypad on the current Combi-Line E safes (for example the CL 410 E).
- All of them need the safe door open when you change a code, and you should test a new code several times before you close the door.
How to open it
Fingerscan (TRSE10): with the code
- Press On/Enter. The yellow LED comes on.
- Enter your 6-digit code. The green LED comes on if it is correct. The red LED comes on if it is rejected.
- Turn the rotary handle clockwise to open the door.
Fingerscan (TRSE10): with your fingers
- Press On/Enter. The yellow LED comes on.
- Move your 1st finger over the sensor. The yellow LED goes off and the green LED flashes briefly when the finger is accepted. Then the yellow LED comes on again.
- Move your 2nd finger (a different finger) over the sensor. The green LED flashes briefly when it is accepted.
- Turn the rotary handle clockwise to open the door.
SecuTronic (lights)
- Press On.
- Enter your 6-digit code.
- The green ready to open icon (Code ✓) comes on.
- Turn the knob to open the lock.
SecuTronic with display
- Switch on the lock with the On/Enter key. The keys light up and the display shows the Burg-Wächter logo, then Code entry.
- Enter your 6-digit PIN code.
- The display says Please turn the knob!
- Turn the knob.
- If the code is entered wrongly three times in a row, the lock is blocked for a while, even for the right code. See the lockout section.
How to change the battery
Use new alkaline batteries (we recommend Procell) and replace all of them together.
Fingerscan (TRSE10): 3 AA (LR6) alkaline
- When the battery LED on the keypad is on, replace all 3 batteries.
- Burg-Wächter’s pictures show how: the cover has a release point at each bottom corner of the keypad housing (its pictures 1 and 2), the cover opens up to show the three batteries (picture 3), and then it closes again (picture 4).
- Put in 3 new AA batteries, close the cover, and test your code and fingers with the safe door open.
SecuTronic (lights): 3 AAA (lock body A) or 3 AA (lock body B)
- When the battery icon comes on, the batteries need replacing.
- Burg-Wächter’s picture shows a small screwdriver at the top edge of the keypad housing to open it, and the batteries behind it. For lock body B (the round keypad), the pictures show the keypad being turned, a small screwdriver used at its edge, and the batteries inside.
- Put in 3 new batteries of the right size, close it, and test the code with the safe door open.
SecuTronic with display: 4 AA (LR6) alkaline
- The battery level is always shown at the top right of the display. When it is low, the display says Please change batteries! Change them as soon as you can.
- Remove the two screws on the underside of the lock electronics. You need a Torx T8 screwdriver (it came with the safe).
- Let the cover slide out together with the batteries.
- Take out the old batteries and put in four new AA batteries, matching the + and – marks on the battery holder. Burg-Wächter says to use branded batteries, not rechargeable ones.
- Push the cover and the batteries back into the lock electronics and tighten the two screws.
- Test your PIN with the safe door open.
- If you are not sure how to get into the battery compartment on your keypad, do not force it: call us.
How to change the code
Change codes with the safe door OPEN.
Test the new code several times with the door open before you close it. Do not use an easy code such as 1-2-3-4-5-6 or a birthday.
Fingerscan (TRSE10): change the code
- Press On/Enter. The yellow LED comes on.
- Type 7 6 (program mode). The yellow LED goes off.
- Press On/Enter and enter the current 6-digit code. The green LED flashes briefly and then the yellow LED flashes. You are in programming mode.
- Type 2 2 (change code) and press On/Enter.
- Type your new 6-digit code and press On/Enter.
- Enter the new code again and press On/Enter. The green LED flashes if the change worked.
- Leave programming mode by pressing Clear twice. Test the new code.
Fingerscan (TRSE10): add or delete fingers
- Get into programming mode as above (On/Enter, 7 6, On/Enter, your code).
- To add a finger: type 2 3 and press On/Enter. Move your finger over the sensor several times until the green LED comes on briefly. To add another finger, type 2 3 again.
- To delete all fingers: type 3 3 and press On/Enter. The green LED flashes if it worked.
- Leave programming mode by pressing Clear twice.
SecuTronic (lights): change the code
- Press On.
- Enter your valid 6-digit code. The green key confirmation flashes briefly.
- Hold Enter for 5 seconds, until the ready to open icon lights up.
- Enter your new 6-digit code and press Enter.
- Enter the new code again and press Enter.
- The green icon means the change worked. The red denied-entry icon means it failed, and the old code stays valid. Try again.
SecuTronic with display: change the code
- Switch the lock on with the On/Enter key, then press Func. The Main menu appears.
- Code change is the first item in the Main menu. Confirm it with On/Enter.
- Scroll with the 1 or 2 key until the administrator or user whose code you want to change is shown, and confirm with On/Enter.
- Enter the old code and confirm with On/Enter.
- Enter the new code and confirm with On/Enter, then repeat it and confirm again.
- The display says Code change completed! Press any key.
- The first time a display lock is started, it asks for the date and time (day, month, year, hour, minutes, two digits each).
- For other functions (adding users on the display lock, for example), use the manual from the download box below.
What the lights and messages mean
| Keypad and signal | What it means |
|---|---|
| Fingerscan: green LED (check icon) | A valid code or finger was accepted, or a programming step worked. |
| Fingerscan: yellow LED on | The lock is ready for your entry (after On/Enter). Flashing yellow means you are in programming mode. |
| Fingerscan: red LED (X icon) | The entry was rejected, or a programming step was wrong. Flashing red means the lock is blocked. |
| Fingerscan: battery LED | Replace all 3 batteries. |
| SecuTronic: Code ✓ (green) | Ready to open: a valid code was entered. |
| SecuTronic: Code ✗ (red) | Denied entry: the code was not valid. |
| SecuTronic: hourglass flashing | Blocked after wrong codes. The lock cannot be opened, even with the right code. |
| SecuTronic: Prog icon | The lock is in programming mode. |
| SecuTronic: battery icon | Replace the batteries. |
| SecuTronic: wrench icon | Service call: maintenance is needed. Contact your dealer (us). |
| SecuTronic: key icon flashes briefly | A key press or action was accepted. |
| Display: battery level at top right, "Please change batteries!" | The batteries are low. Replace them as soon as you can. |
| Display: lock icon (open or closed) | Shows whether the locking mechanism has released the lock and the safe can be opened. |
| Display: "Please turn the knob!" | The PIN was accepted. Turn the knob. |
| Display: countdown on the screen | The lock is blocked after wrong codes. The time left is shown. |
Wrong-code lockout
Fingerscan (TRSE10): after 3 wrong codes in a row, the lock is blocked for 5 minutes. After that, each further wrong entry blocks it for 10 minutes. The red LED flashes while it is blocked, and the safe will not open even with the correct code or a finger. SecuTronic (lights): after 3 wrong codes in a row, 5 minutes, then 20 minutes after any further wrong entry. The hourglass icon flashes. SecuTronic with display: after 3 wrong codes in a row, 5 minutes, then 10 minutes for every further wrong entry, with the time left shown on the display.
If it still won’t open
Nothing lights up when I press On
Replace the batteries (see the battery section for your keypad). If it is still dead, call us. Do not force the safe open.
The right code is rejected
If the lock is blocked after wrong tries, it will not open even with the right code until the time is over. Wait it out, then enter the code again.
My fingerprint is not accepted (Fingerscan)
Use your 6-digit code instead. The safe opens with either. If neither works, call us.
The wrench icon is on (SecuTronic)
That means the lock needs maintenance. Call us.
Download the full manufacturer instructions
This page is a quick-reference summary. For every feature and diagram, use the official manual for your model:
- BURG-WÄCHTER TRSE10 operating instructions, Combi-Line E FS (PDF)BA TRSE10 05/2017. Fingerscan keypad. Hosted by Burg-Wächter.
- BURG-WÄCHTER SecuTronic operating instructions, lock body A and B (PDF)BA SecuTronic 03/2015. Burg-Wächter’s own document, copy hosted by a retailer.
- BURG-WÄCHTER SecuTronic (TRSE 12 H) user manual with display (PDF)English section. Hosted by Burg-Wächter.
- Burg-Wächter operating and assembly instructionsManufacturer download page for other Burg-Wächter electronics.
Need a hand?
Still stuck? We can help.
Having a hard time getting into your safe? Our technicians are trained to open malfunctioning safes professionally, so your valuables can still be safely secured. Call us or stop by.
Steve’s Lock, Safe and Alarm · 3401 N. Sepulveda Blvd, Manhattan Beach, CA 90266
More lock guides
About this guide. This is an independent guide from Steve’s Lock, Safe and Alarm, a safe and lock dealer. Brand and model names belong to their owners and are used only to help you identify your lock. We are not affiliated with the manufacturers. These steps summarize the manufacturers’ own instructions; your lock may be a different version, so if anything here does not match what your lock does, follow your manual or call us. Always change codes with the safe door open, and test the new code several times before you close the door.
Steps last checked against the manufacturer documents on October 15, 2026.