
Safe lock help · Sargent & Greenleaf
Safe lock troubleshooting › Sargent & Greenleaf › 6126 / 6127 Audit Lock
The Sargent & Greenleaf 6126 and 6127 Audit Locks use a two-digit PIN position plus a six-digit code. This guide covers how to open the safe, change your own PIN code, change the two 9-volt batteries, and what the beep patterns mean.
Want the whole manual? Jump to the manufacturer download links.
Is this your lock?
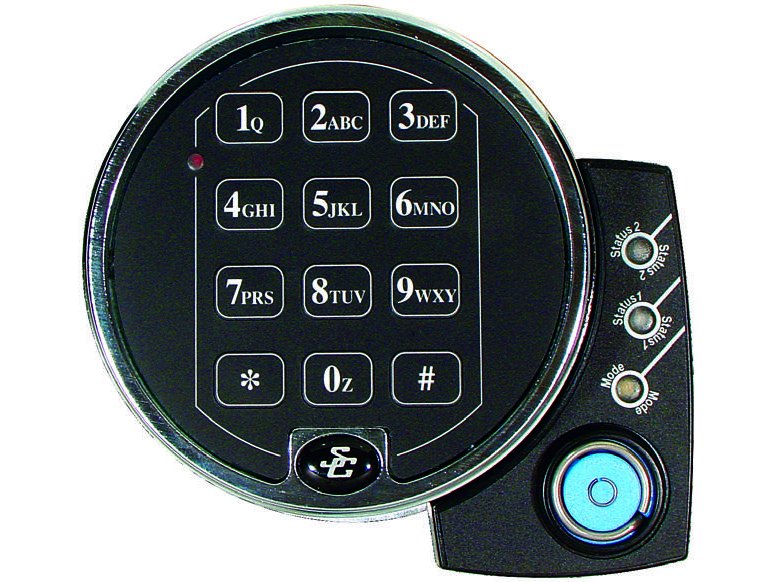
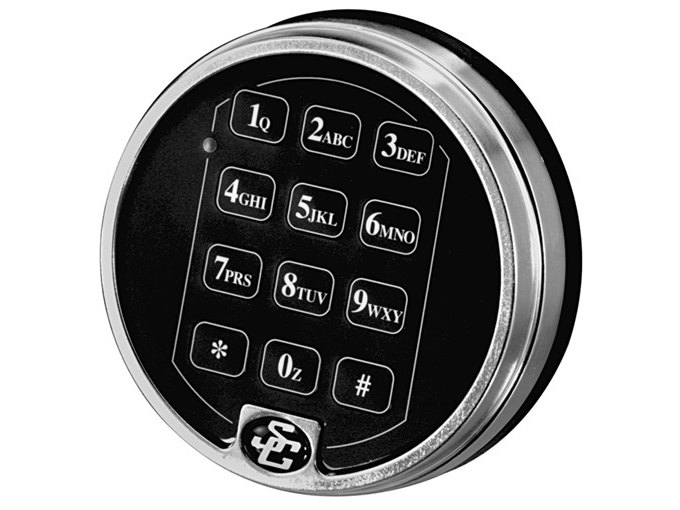
- A round S&G keypad with keys 1 to 9, *, 0 and #, letters under the number keys, and the S&G logo at the bottom.
- To open it you enter a 2-digit PIN position and a 6-digit PIN code, then #. Each person who uses the lock has their own position.
- The 6126 has a standard bolt and the 6127 is the push/pull version. To check which you have, press 43* and listen to the three sets of beeps: 4, 2, 4 beeps is a 6126, and 5, 2, 2 beeps is a 6127.
- Older Comptronic 6124 / 6125 locks look similar but are set up differently.
How to open it
- Enter your 2-digit PIN position.
- Enter your 6-digit PIN code, then press #.
- Turn the safe handle to the unlocked position within 6 seconds.
- Do not wait more than 10 seconds between entries or the lock clears and you must start over.
- Pressed a wrong key? Press * twice to clear the lock and start again. A single long beep after # means an error: clear and retry, or wait 10 seconds.
- If your lock uses a time delay, you hear 3 rapid beeps after your first code, then one beep every 10 seconds. At the end you hear 10 rapid beeps, which starts the opening window: two beeps every 6 seconds. Enter your position and code again during that window, then turn the handle within 6 seconds.
How to change the battery
The lock uses two 9-volt alkaline batteries behind the keypad (we recommend Procell). The lock does not lose any codes or program settings during a battery change. The steps below are for the standard two-battery keypad; your lock may have a different keypad.
- Carefully lift the bottom edge of the keypad housing (the edge closest to the S&G logo) and ease it off the base. Support the keypad so it does not hang by its cable.
- Detach the old batteries from their terminals.
- Attach the new batteries. Support the top of each battery holder with your other hand so it does not bend or break.
- Press the keypad housing back onto the base.
- With the door open, enter your PIN position and code to confirm the lock works.
Low-battery signals
5 double-beeps when the lock opens after a correct code: the batteries are low. Change them soon.
20 beeps when you enter a code: the batteries are too low for the lock to work. The lock will not open. Replace them right away and enter your code again.
After a battery change you may hear an SOS
If your lock has the optional keypad tamper indicator, taking the keypad off the base counts as a disturbance. The next time you enter a valid code, you hear an SOS (3 short high beeps, 3 short low beeps, 3 short high beeps), twice, and the lock does not open.
This is expected. When the SOS stops, enter a valid code within one minute and the tamper indicator resets and the lock opens. If your lock is in Manager/Employee mode, a Manager or Supervisor may have to re-enable it.
How to change the code
Always leave the safe door OPEN while changing codes.
Test the new code at least three times before you close the door.
Use this to change your own PIN code. Your PIN position stays the same. A code can contain any numbers or letters except # and *.
- Press 22*.
- Enter your 2-digit PIN position, then your current 6-digit code and #. You hear 5 beeps.
- Enter your PIN position again, then your new 6-digit code and #. You hear 3 beeps.
- Enter your PIN position one more time, then the new code and # again. You hear 3 beeps.
- Try the new code at least three times with the door open.
- Wait for each set of beeps to end before you press anything else, or you interrupt the lock.
- Adding or removing other users, setting the time delay and other programming are done with other commands, by a Manager or Supervisor. Call us if you need help with those.
- Change the factory-set code as soon as the lock is installed. Check your paperwork for the PIN position and code you were given.
What the beeps and lights mean
The lock beeps with each key press and gives different patterns for different conditions. Always let a pattern finish before you press another key.
| What you hear / see | What it means |
|---|---|
| 1 beep and a red LED flash | Normal: each key press was accepted. No beep or flash at all usually means weak or dead batteries. |
| 5 double-beeps as the lock opens | Low battery. Change the batteries soon. |
| 20 beeps | Batteries depleted. The lock will not open until they are replaced. |
| One long beep after # | Entry error. Press * twice to clear, or wait 10 seconds, then try again. |
| 2 harsh "brap" tones when you enter a code | The lock is in penalty time. Entries are ignored. Wait it out. |
| One double-beep (low then high) | The lock bolt has extended to the locked position. |
| 3 beeps after a command or new code | The step was accepted. |
| SOS: 3 high, 3 low, 3 high beeps | Keypad tamper warning (the keypad was removed from its base). See the battery section. |
| 3 quick beeps, then 1 beep every 10 seconds, then 10 quick beeps | Time delay started, counting down, and finished. The opening window follows (2 beeps every 6 seconds). |
Wrong-code lockout
If you enter 5 incorrect codes in a row, the lock goes into a 10-minute penalty time and cannot be opened. During penalty time, more input has no effect: just wait the 10 minutes before you enter a valid code.
If it still won’t open
No beep and no flash when I press keys
Check the batteries: they should be fresh and firmly connected. See the battery section above.
I hear beeps but the lock will not open
Move the safe handle to the fully locked position and enter your code again. If the lock is in penalty time or the batteries are depleted, wait or replace them as described above. Otherwise call us.
Download the full manufacturer instructions
This page is a quick-reference summary. For every feature and diagram, use the official manual for your model:
- S&G Models 6126 and 6127 Audit Lock: Programming and Operating Instructions (PDF)Sargent & Greenleaf document 630-711, revised 3/5/2013. Hosted by S&G.
- Sargent & Greenleaf supportManufacturer website, with product and support pages.
Need a hand?
Still stuck? We can help.
Having a hard time getting into your safe? Our technicians are trained to open malfunctioning safes professionally, so your valuables can still be safely secured. Call us or stop by.
Steve’s Lock, Safe and Alarm · 3401 N. Sepulveda Blvd, Manhattan Beach, CA 90266
More lock guides
About this guide. This is an independent guide from Steve’s Lock, Safe and Alarm, a safe and lock dealer. Brand and model names belong to their owners and are used only to help you identify your lock. We are not affiliated with the manufacturers. These steps summarize the manufacturers’ own instructions; your lock may be a different version, so if anything here does not match what your lock does, follow your manual or call us. Always change codes with the safe door open, and test the new code several times before you close the door.
Steps last checked against the manufacturer documents on October 14, 2026.